A good messy bun beanie is one of those projects that feels both practical and stylish. It’s perfect for those days when you want your hair up but still need a cozy layer of warmth. This particular pattern has become a favorite for a reason: it’s straightforward, works up relatively quickly, and results in a hat that fits just right for keeping your bun out of the way. Whether you’re new to crochet or have been hooking for years, this beanie is a satisfying make. Choosing Your Yarn and Hook For this messy bun beanie, you’ll want a yarn that has a nice drape and some warmth. Worsted weight yarn is a fantastic choice because it’s readily available in so many colors and fibers, and it works up at a good pace on a medium-sized hook. Acrylic yarns are excellent for beginners; they’re forgiving, washable, and don’t split easily. If you prefer a more natural feel, a wool blend can offer extra warmth and a lovely texture. Look for yarns that are machine washable if you plan to wear your beanie often. The hook size will depend on your personal tension, but a common recommendation for worsted weight yarn is a US size H/8 (5.0 mm) or I/9 (5.5 mm) crochet hook. A larger hook will create a looser fabric, which is often desirable for beanies to give them a bit of stretch and softness. Always check the yarn label for the manufacturer’s recommended hook size, and be prepared to adjust by a half size up or down to achieve the fabric you like. A gauge swatch is important to ensure your beanie turns out the right size. Aim for about 13-15 stitches and 8-10 rows in double crochet (dc) over 4 inches (10 cm) with your chosen yarn and hook. Don’t skip this step; it prevents your hat from being too tight or too loose!
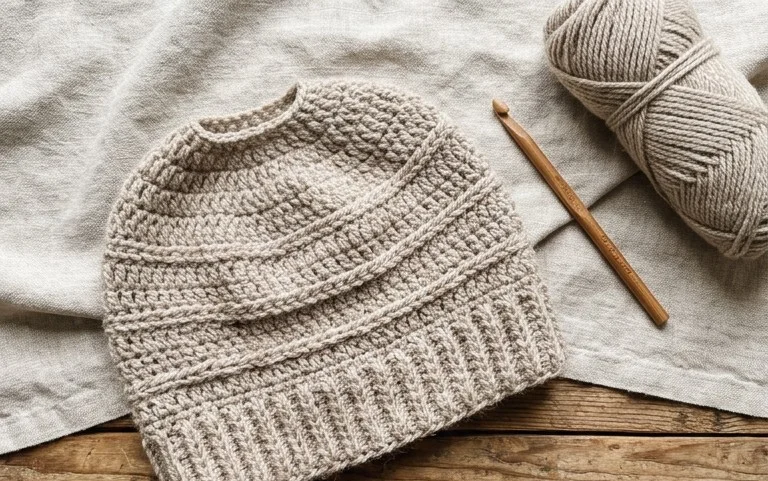
Crocheting Your Own Popular Messy Bun Beanie
A good messy bun beanie is one of those projects that feels both practical and stylish. It’s perfect for those days when you want your hair up but still need a cozy layer of warmth. This particular pattern has become a favorite for a reason: it’s straightforward, works up relatively quickly, and results in a hat that fits just right for keeping your bun out of the way. Whether you’re new to crochet or have been hooking for years, this beanie is a satisfying make.
Choosing Your Yarn and Hook
For this messy bun beanie, you’ll want a yarn that has a nice drape and some warmth. Worsted weight yarn is a fantastic choice because it’s readily available in so many colors and fibers, and it works up at a good pace on a medium-sized hook. Acrylic yarns are excellent for beginners; they’re forgiving, washable, and don’t split easily. If you prefer a more natural feel, a wool blend can offer extra warmth and a lovely texture. Look for yarns that are machine washable if you plan to wear your beanie often.
The hook size will depend on your personal tension, but a common recommendation for worsted weight yarn is a US size H/8 (5.0 mm) or I/9 (5.5 mm) crochet hook. A larger hook will create a looser fabric, which is often desirable for beanies to give them a bit of stretch and softness. Always check the yarn label for the manufacturer’s recommended hook size, and be prepared to adjust by a half size up or down to achieve the fabric you like. A gauge swatch is always a good idea, especially if you’re aiming for a specific size.
Understanding the Stitches
This pattern primarily uses a few fundamental crochet stitches, making it very accessible.
- Chain (ch): This is the foundational stitch for almost all crochet projects. It creates a series of interlocking loops.
- Slip Stitch (sl st): Used for joining rounds or moving yarn without adding height.
- Single Crochet (sc): A basic, short stitch that creates a dense fabric.
- Half Double Crochet (hdc): Taller than single crochet, it creates a slightly looser and more flexible fabric.
- Double Crochet (dc): A taller stitch that works up quickly and creates a more open, drapey fabric.
- Front Post Double Crochet (fpdc): This stitch is worked around the post of the stitch below, from front to back. It creates a raised texture that gives the beanie a lovely ridged appearance.
- Back Post Double Crochet (bpdc): The opposite of fpdc, this stitch is worked around the post of the stitch below from back to front. It also creates a raised texture, complementing the fpdc.
The combination of single crochet for the brim and then double crochet with the front and back post stitches for the body creates a hat that’s both sturdy at the edge and beautifully textured on top. The front and back post stitches are what give this beanie its signature ribbed look, which is both decorative and helps the hat stretch comfortably over your bun.
Tips for Beginner Crocheters
If you’re new to crochet, don’t be intimidated! This pattern is a great place to start.
- Practice your stitches: Before you begin the beanie, make a few practice swatches of single crochet, half double crochet, and double crochet. This will help you get a feel for the yarn and hook.
- Master the foundation chain: A consistent foundation chain is key to a straight edge. Try to keep your tension even.
- Count your stitches: It’s easy to accidentally add or miss stitches, especially in the beginning. Count your stitches at the end of each round or every few rounds to ensure your beanie grows evenly.
- Learn to read your stitches: Understanding how to identify your stitches will help you place your hook correctly in the next round and avoid mistakes.
- Don’t be afraid to frog it: “Frogging” is when you unravel your work. If you make a mistake, it’s usually better to go back a few stitches or rows than to try and force it.
- Keep your tension consistent: This is perhaps the most important tip for any crocheter. Try to hold your yarn and hook in a relaxed but consistent way throughout your project.
For the front and back post stitches, take your time. You’ll insert your hook under the “post” (the vertical part) of the stitch from the previous row. It might feel a little awkward at first, but with a little practice, you’ll find the rhythm.
Customizing Your Beanie
The beauty of crochet is its versatility. This pattern can be easily customized to suit your style.
Colors
- Stripes: Change colors at the beginning of a round for clean stripes. You can do this every few rounds, or even every other round for a bolder look.
- Ombre: If you have yarn that transitions through colors, or if you buy multiple shades of the same color family, you can create a beautiful ombre effect.
- Contrast Brim: Work the brim in a contrasting color to the main body of the hat. This adds a pop of personality.
- Solid Color: Of course, a simple solid color in your favorite shade is always a classic choice.
Sizes
This pattern is typically written for a standard adult size. To adjust for different sizes, you’ll most often modify the number of rounds you crochet for the body of the hat before beginning the decrease section for the crown.
- Smaller sizes (children, xs): Crochet fewer rounds for the main body.
- Larger sizes (xl, xxl): Crochet more rounds for the main body.
It’s essential to measure your head or the intended recipient’s head as you go. The circumference of the beanie before you start the crown decreases should be slightly smaller than the actual head circumference, as the stitches will stretch. You can also adjust the height by adding or removing rows.
Care Instructions for Your Finished Piece
Once your beanie is complete, proper care will help it last for years.
- Washing: For acrylic yarns, machine wash on a gentle cycle with cold or lukewarm water. If you used wool or a wool blend, hand washing is recommended.
- Drying: Never put your crochet item in a machine dryer on a hot setting; it can cause acrylic to melt or distort, and wool to shrink. Instead, lay your beanie flat to air dry. Reshape it while it’s damp to maintain its original form.
- Blocking: While not always necessary for acrylic, blocking can help open up the stitches and give your beanie a more polished look. You can gently steam block or pin it to shape on a flat surface.
Always check the yarn label for specific care instructions for the yarn you used.
Project Ideas and Variations
Beyond a simple single-color beanie, consider these ideas:
- Pom-Pom Topper: Add a faux fur or yarn pom-pom to the top for extra flair.
- Button Detail: Sew a decorative button onto the side of the brim.
- Two-Toned Brim: Alternate colors every few rounds for the brim.
- Lace Detail: If you’re feeling adventurous, you could incorporate a simple lace repeat into the body of the hat by modifying the stitch count and pattern.
- Matching Set: Crochet matching mittens or a scarf to go with your beanie.
This popular messy bun beanie pattern is a rewarding project that offers endless possibilities for personalization. Enjoy the process of creating something cozy and stylish for yourself or as a thoughtful gift.
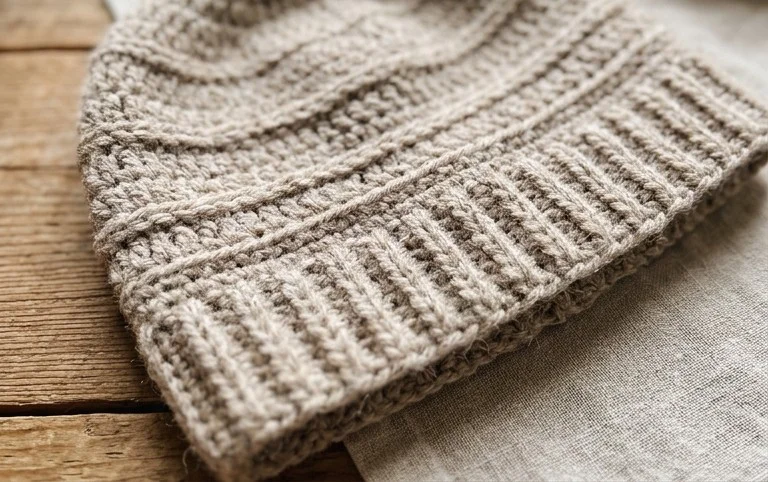
You’ve got the knack for making this popular messy bun beanie now. It’s a pattern that proves you don’t need to spend a lot of time or money to create something both functional and fashionable. Think about making them in different colors to match your wardrobe, or even try a variegated yarn for a unique look. These also make fantastic gifts; imagine a set of coordinating beanies for a group of friends. Once you’ve finished your first one, share a photo on social media and tag us! We love seeing your creations. Don’t stop here; explore our other free patterns for your next cozy project.