That little grin, the big friendly eyes, and the slight curve of the brim – a crochet frog hat is pure joy in yarn form. Making one yourself brings that same cheerful feeling. This pattern from thecaffeinatedsnail.com walks you through creating an adorable froggy hat perfect for a little one, a fun photo prop, or even a quirky accessory for yourself. Yarn and Hook Recommendations For this project, you’ll want a yarn that has a nice bit of structure so the hat holds its shape well. Worsted weight yarn is generally a good bet, and acrylic is a popular choice because it’s durable, washable, and comes in a rainbow of colors. Cotton blends can also work for a slightly stiffer fabric. You’ll likely need two main colors: a green for the frog’s body and a lighter color, perhaps cream or white, for the belly and eye details. Black yarn is usually needed for the pupils of the eyes. The pattern will specify a hook size, but a common recommendation for worsted weight yarn is a G/6 (4.0 mm) or H/8 (5.0 mm) crochet hook. Using a hook that’s slightly smaller than recommended for the yarn can help create a denser fabric, which is ideal for hats as it prevents gaps and makes the hat warmer. Always do a small swatch with your chosen yarn and hook before you begin; it should feel firm but not stiff, and shouldn’t have large holes when you stretch it slightly. Essential Stitch Techniques This frog hat pattern relies on some fundamental crochet stitches. You’ll need to be comfortable with the magic ring, single crochet, increase, and decrease stitches. If you’re new to any of these, don’t worry! Many online tutorials can show you exactly how to do them. Understanding how to crochet in continuous rounds is also key for creating seamless pieces. The pattern breaks down each step clearly, making it accessible even if you’re still building your crochet confidence. With these basic stitches and a little patience, you’ll have a charming frog hat ready in no time.
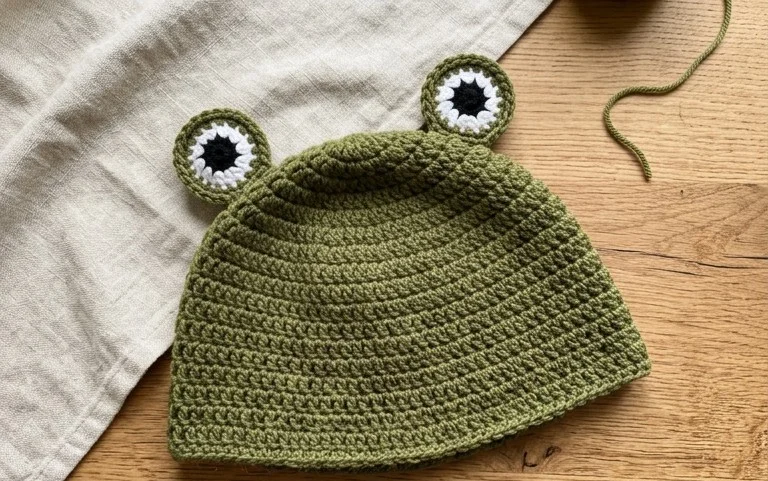
Crochet Frog Hat Pattern from thecaffeinatedsnail.com
That little grin, the big friendly eyes, and the slight curve of the brim – a crochet frog hat is pure joy in yarn form. Making one yourself brings that same cheerful feeling. This pattern from thecaffeinatedsnail.com walks you through creating an adorable froggy hat perfect for a little one, a fun photo prop, or even a quirky accessory for yourself.
Yarn and Hook Recommendations
For this project, you’ll want a yarn that has a nice bit of structure so the hat holds its shape well. Worsted weight yarn is generally a good bet, and acrylic is a popular choice because it’s durable, washable, and comes in a rainbow of colors. Cotton blends can also work for a slightly stiffer fabric. You’ll likely need two main colors: a green for the frog’s body and a lighter color, perhaps cream or white, for the belly and eye details. Black yarn is usually needed for the pupils of the eyes.
The pattern will specify a hook size, but a common recommendation for worsted weight yarn is a G/6 (4.0 mm) or H/8 (5.0 mm) crochet hook. Using a hook that’s slightly smaller than recommended for the yarn can help create a denser fabric, which is ideal for hats as it prevents gaps and makes the hat warmer. Always do a small swatch with your chosen yarn and hook before you begin; it should feel firm but not stiff, and shouldn’t have large holes when you stretch it slightly.
Essential Stitch Techniques
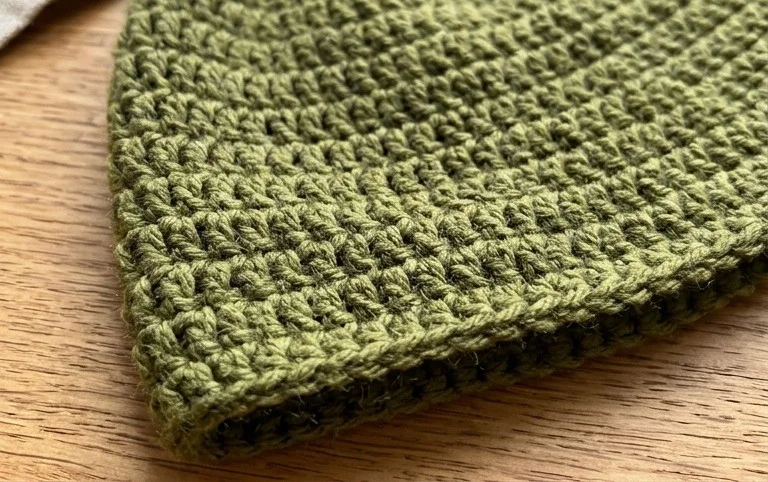
This frog hat pattern relies on some fundamental crochet stitches that are excellent for beginners to practice. You’ll be working primarily in the round, creating a flat circle for the top of the hat and then working straight rows for the main body.
- Magic Ring (or Magic Circle): This is a common way to start working in the round, creating a tight center hole that you can later cinch closed. It makes for a neat, professional-looking start.
- Single Crochet (sc): This is the most basic crochet stitch and forms a dense, firm fabric. You’ll use this for most of the hat’s construction.
- Half Double Crochet (hdc): This stitch is taller than a single crochet and creates a slightly looser fabric. It’s often used for ribbing or for parts of the hat where you want a bit more drape.
- Double Crochet (dc): This is a taller stitch still, and while it might not be the primary stitch for the hat itself, you might encounter it for details like the eye stalks or other decorative elements.
- Increase (inc): This technique involves working two stitches into the same stitch from the previous row. This is how you expand the flat circle of the hat top.
- Decrease (dec): This is the opposite of an increase and is used to shape the hat as you work downwards or to close openings.
- Slip Stitch (sl st): Used to join rounds or to move your hook across stitches without adding height.
Don’t be intimidated if some of these are new to you. Most crochet patterns include explanations or links to tutorials for basic stitches, and there are countless free videos online that demonstrate each one clearly. Practice a few rows of single crochet and how to do an increase before you start the hat itself.
Tips for Beginners
Starting a crochet hat can feel daunting, but this frog hat pattern is designed to be accessible. Here are a few tips to make your experience smoother:
- Read the Entire Pattern First: Before you even pick up your hook, read through the whole pattern. This helps you understand the flow and identify any steps that might be confusing.
- Use a Stitch Marker: When working in the round, it’s very easy to lose track of your starting stitch. Place a stitch marker in the first stitch of each round so you know exactly where to join and where to start the next.
- Count Your Stitches: This is probably the most important tip. After each round where you increase, count your stitches to ensure you have the correct number. If you’ve made a mistake, it’s much easier to fix it early on than to unravel a large section.
- Don’t Pull Too Tight: Crocheting too tightly can make your project stiff and difficult to work with. Try to maintain a consistent tension.
- Weave in Ends as You Go: Especially for the different colors on this hat, weaving in your yarn tails as you finish each section prevents a big, overwhelming chore at the end.
- Watch Video Tutorials: If you get stuck on a particular stitch or technique, search for a video tutorial. Seeing it done in real-time can be a game-changer.
Customizing Your Frog Hat
One of the best parts of crochet is the ability to make it your own. This frog hat pattern offers plenty of opportunities for personalization.
- Colors: The most obvious customization is color. Beyond the traditional green and cream, think about other color combinations. A lime green with a pale yellow belly, or even a purple frog with pink accents! You can also change the color of the eyes, or use a variegated yarn for a fun, speckled look.
- Sizes: The pattern likely provides instructions for different sizes, or you can adapt it. For a larger hat, you’ll generally need to add more increase rounds to the initial flat circle to make it wider. For a smaller hat, you’ll do fewer increase rounds. Always check your gauge (the number of stitches per inch) to ensure your size adjustments will work out.
- Details: You can get creative with the eyes. Add larger pupils, different colored irises, or even little white highlights to make them pop. You could also add a small crocheted tongue sticking out, or some subtle color changes to the brim for a striped effect.
Care Instructions for Your Finished Piece
Once your frog hat is complete, proper care will help it last for years of happy wear.
- Washing: For acrylic yarns, hand washing in cool water with a mild detergent is usually best. Gently squeeze out excess water, but don’t wring it. If the yarn label allows, some acrylics can be machine washed on a gentle cycle in a mesh laundry bag. Always check your yarn’s care label.
- Drying: Never put a crocheted item in a hot dryer, as this can melt acrylic fibers and distort the shape. Lay the hat flat on a clean towel, reshaping it to its original dimensions as you do. You can roll it up in the towel to absorb more moisture, then let it air dry completely.
- Storage: Store your hat folded or loosely rolled in a drawer or on a shelf. Avoid hanging it for long periods, as this can stretch out the stitches.
Project Ideas
This frog hat pattern is versatile and can be used for more than just keeping heads warm.
- Baby Shower Gift: A crocheted hat is a thoughtful, handmade gift. This frog hat is sure to get smiles.
- Photography Prop: Perfect for newborn or toddler photoshoots, especially around springtime or for a woodland-themed shoot.
- Costume Accessory: Great for a simple Halloween costume or for imaginative play.
- Matching Sets: Make a matching hat and scarf set for a coordinated look.
- Doll or Stuffed Animal Hat: Scale down the pattern to create adorable accessories for toys.
This Crochet Frog Hat Pattern from thecaffeinatedsnail.com is a fantastic project for anyone looking to add a touch of whimsical charm to their crochet repertoire. With clear instructions and opportunities for creative flair, you’ll be well on your way to crafting a delightful froggy friend.
You’ve got all the steps to crochet your own happy little frog hat! It’s a wonderfully satisfying project, and seeing the finished hat come to life is always a thrill. Don’t hesitate to experiment with different shades of green or add unique eye details. If you make one, please share a picture on social media and tag thecaffeinatedsnail.com – seeing your creations is the best part! Feel free to explore more fun patterns here for your next handmade adventure. Happy crocheting!