The smell of crisp autumn air, the crunch of fallen leaves underfoot, and the sight of warm, earthy tones everywhere – that’s what inspires these rustic pumpkin crochet patterns. These pumpkins aren’t just decorations; they’re little bundles of cozy, handmade charm that bring a touch of fall into your home. They’re perfect for adorning shelves, mantels, or even as part of a festive centerpiece. Yarn and Hook Recommendations For that perfect rustic feel, you’ll want to reach for yarns that have a bit of texture and natural warmth. Worsted weight yarn is your go-to for these pumpkins. It’s widely available, works up at a good pace, and gives a nice, solid structure to the pumpkin shape. Cotton blends are excellent because they have a slight sheen and hold their shape well, preventing your pumpkins from looking droopy. Acrylic yarns are also a fantastic and budget-friendly option, especially if you want a wider range of colors. For a truly rustic look, consider yarns in earthy tones like pumpkin spice, burnt orange, deep brown, creamy beige, or even a muted forest green. When it comes to hooks, a size H-8 (5.0 mm) or I-9 (5.5 mm) crochet hook usually works wonderfully with worsted weight yarn. The exact hook size can vary slightly depending on the yarn’s specific gauge and your personal crocheting tension. If your stitches are looking too tight and you’re having trouble inserting your hook, try going up a hook size. If your fabric feels loose, go down a hook size. You’re going to learn how to make these charming pumpkins, from selecting the right materials to the basic stitches that create their signature round shape and ribbed texture. Even if you’re new to crochet, these patterns are designed to be approachable. You’ll get a satisfying finished object quickly, making them great for last-minute gifts or a fun weekend project.
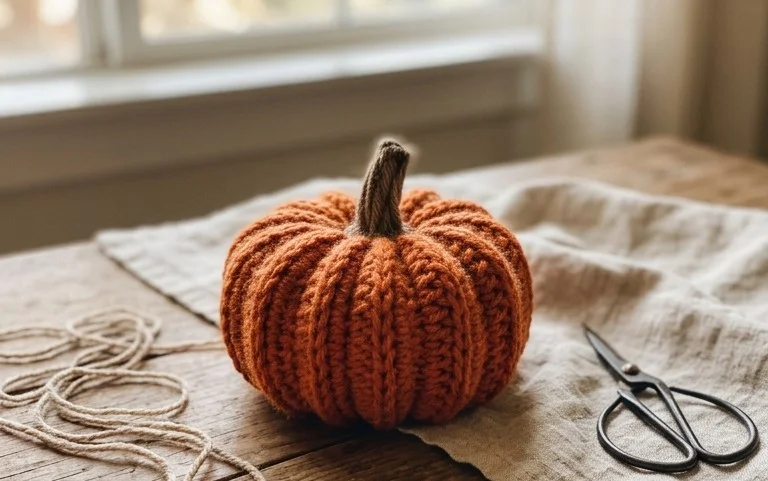
Rustic Pumpkin Crochet Free Patterns
The smell of crisp autumn air, the crunch of fallen leaves underfoot, and the sight of warm, earthy tones everywhere – that’s what inspires these rustic pumpkin crochet patterns. These pumpkins aren’t just decorations; they’re little bundles of cozy, handmade charm that bring a touch of fall into your home. They’re perfect for adorning shelves, mantels, or even as part of a festive centerpiece.
Yarn and Hook Recommendations
For that perfect rustic feel, you’ll want to reach for yarns that have a bit of texture and natural warmth. Worsted weight yarn is your go-to for these pumpkins. It’s widely available, works up at a good pace, and gives a nice, solid structure to the pumpkin shape. Cotton blends are excellent because they have a slight sheen and hold their shape well, preventing your pumpkins from looking droopy. Acrylic yarns are also a fantastic and budget-friendly option, especially if you want a wider range of colors. For a truly rustic look, consider yarns in earthy tones like pumpkin spice, burnt orange, deep brown, creamy beige, or even a muted forest green.
When it comes to hooks, a size H-8 (5.0 mm) or I-9 (5.5 mm) crochet hook usually works wonderfully with worsted weight yarn. The exact hook size can vary slightly depending on the yarn’s specific gauge and your personal crocheting tension. If your stitches are looking too tight and you’re having trouble inserting your hook, try going up a hook size. If your fabric feels loose or gappy, go down a hook size. It’s always a good idea to make a small swatch with your chosen yarn and hook to see how it feels and looks before you start your pumpkin.
Stitch Techniques Used
These rustic pumpkins primarily rely on a few fundamental crochet stitches, making them accessible even for those who are relatively new to the craft. The most common stitch you’ll find is the single crochet (sc). This is the workhorse stitch that creates a dense, sturdy fabric perfect for shaping. You’ll also likely encounter the half double crochet (hdc), which creates a slightly taller stitch with a bit more drape than the single crochet, and the double crochet (dc) for a quicker build.
Many patterns will utilize the magic circle (or magic ring) to start the base of the pumpkin. This creates a tight, seamless center hole, which is ideal for closed shapes like pumpkins. Don’t be intimidated by it; there are plenty of video tutorials online that make it easy to learn. You’ll also be working in rounds, crocheting in a circular fashion to build up the pumpkin’s body. Some patterns might incorporate increase (inc) and decrease (dec) stitches to shape the pumpkin, allowing it to curve and round out. Finally, for the stem, you might use slip stitches (sl st) and chain stitches (ch) to create a short, textured stalk.
Tips for Beginners
If you’re just starting out with crochet, these pumpkin patterns are a fantastic project to tackle.
- Don’t skip the swatch: Before you begin, crochet a small square with your yarn and hook. This helps you understand how tight or loose your stitches are and ensures you’re achieving the desired fabric.
- Count your stitches: It’s easy to lose track when working in the round. Place a stitch marker in the first stitch of each round to help you know where you are and ensure you’re not missing or adding stitches unintentionally.
- Learn the magic circle: While you can start with chains, the magic circle creates a much neater, tighter base for your pumpkin. It’s a skill worth mastering early on.
- Tension is key: Try to keep your tension as consistent as possible throughout the project. This will make your pumpkin look smooth and evenly shaped. If you’re finding it hard, take a break and then come back to it with a fresh perspective.
- Don’t be afraid to frog: “Frogging” is crochet-speak for undoing your stitches. If you make a mistake that you can’t fix, it’s better to unravel a few rows than to have a pumpkin that’s not quite right.
How to Customize
The beauty of these patterns is how easily they can be personalized.
- Colors: While classic orange is wonderful, don’t limit yourself. Try softer blush pinks, muted creams, rich burgundies, or even variegated yarns that have multiple colors woven together for a unique look. For a more modern farmhouse vibe, consider greys or whites.
- Sizes: Most patterns will indicate the approximate finished size. To make a larger pumpkin, simply continue working more rounds before starting your decreases. For a smaller pumpkin, work fewer rounds. You can also adjust the hook size slightly to achieve different dimensions.
- Texture: Experiment with different yarn fibers. Wool will give a very rustic, slightly fuzzy texture, while cotton offers a smoother finish. You can also combine yarns for a marled effect.
- Stem: The stem is a great place for creativity. Instead of a simple crochet stem, you could wrap a piece of brown yarn around a small twig or even use a small piece of faux leather for a modern touch.
Care Instructions for the Finished Piece
Taking care of your handmade pumpkins is simple, ensuring they bring fall cheer for years to come.
- Washing: For most acrylic or cotton blends, a gentle hand wash is best. Use cool water and a mild detergent. Avoid harsh scrubbing.
- Drying: Gently squeeze out excess water without wringing. Lay the pumpkin flat on a clean towel or a drying rack away from direct sunlight and heat to air dry completely. Do not machine dry, as the heat can cause the stuffing to clump or the yarn to lose its shape.
- Stuffing: If your pumpkin loses its shape over time, you can carefully open a small seam and add more stuffing (polyester fiberfill is ideal) to plump it back up.
Project Ideas
These rustic pumpkins are incredibly versatile.
- Table Centerpiece: Arrange a collection of various sized pumpkins in different fall colors down the center of your dining table. Add some faux leaves or small gourds for extra flair.
- Mantel Decor: Line them up along your fireplace mantel for a cozy autumn display.
- Bowl Fillers: Tuck a few smaller pumpkins into decorative bowls or baskets around your home.
- Gift Giving: A handmade pumpkin makes a thoughtful and unique gift for friends and family who appreciate handcrafted items. Package them with a tag that includes care instructions.
- Seasonal Garland: String several small pumpkins together with sturdy yarn or twine to create a festive fall garland for your wall or doorway.
Enjoy crafting these charming little pumpkins and bringing a touch of rustic autumn magic into your home!
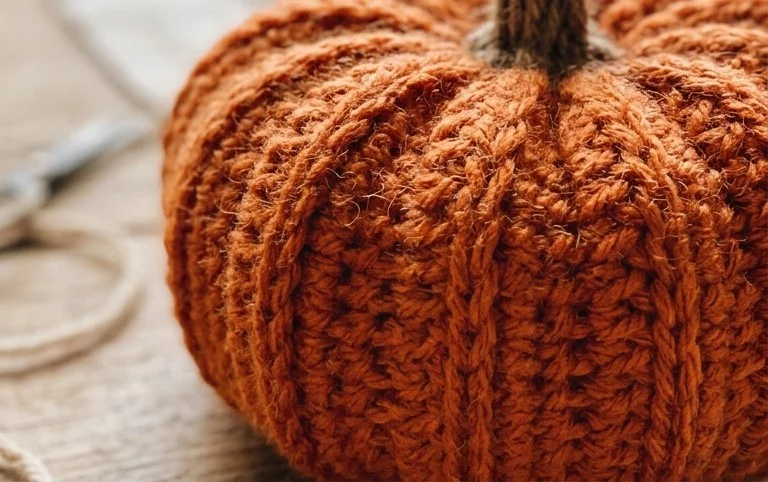
Making these rustic pumpkins is a really satisfying way to bring that cozy autumn feeling into your space. Whether you crochet just one or a whole patch, they add instant charm. Remember, you can play with the colors – think deep blues for a midnight pumpkin, or even a creamy white for a frosted look. Adding a bit of stuffing makes them plump and huggable, perfect for little hands or just to set on a shelf. If you enjoyed making these, be sure to share a picture of your finished pumpkins on social media – tag us so we can see your creations! We love seeing how you bring these patterns to life. Keep an eye out for more crochet ideas on our site; we’re always adding new ways to get creative with yarn.