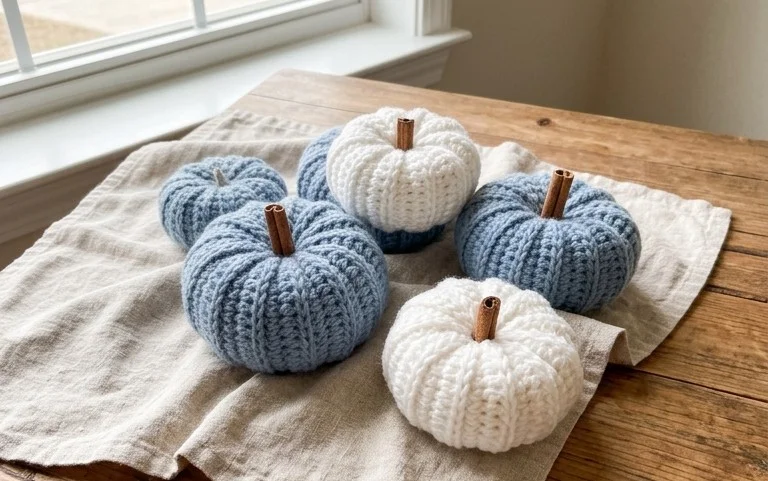
Crocheting a small bunch of pumpkins, no bigger than your palm, brings such a cozy feeling of autumn right into your home. They have a lovely round shape and a soft texture from the yarn, making them perfect little decorations. Imagine them grouped together on a side table or tucked onto a bookshelf. These are especially good for anyone just starting out with crochet because the stitches are simple and you can make one relatively quickly. They also make thoughtful little gifts for friends or family who love seasonal decor. This step-by-step guide from Maria’s Blue Crayon will walk you through creating your own patch of these charming pumpkins, even if you’re still getting the hang of your crochet hook.
Easy Crochet Pumpkins: A Step-by-Step Tutorial
Crocheting these little pumpkins brings a lovely bit of autumn charm into the home. They’re quick to make, perfect for using up scraps of yarn, and look wonderful scattered on a mantelpiece, a shelf, or even as part of a Thanksgiving centerpiece. This tutorial from Maria’s Blue Crayon breaks down exactly how to create them, step by step, so even if you’re relatively new to crochet, you can get a whole patch going.
Yarn and Hook Recommendations
For these pumpkins, you’ll want a yarn that has a nice, firm stitch definition. Worsted weight acrylic yarn is a fantastic choice because it’s widely available, comes in a huge range of colors (especially those lovely autumnal shades), and is easy to work with. It also holds its shape well, which is important for creating that characteristic pumpkin roundness. You can also use a cotton or cotton blend yarn for a slightly different texture and drape.
Maria’s Blue Crayon suggests a crochet hook size that complements the yarn you choose. Typically, for worsted weight yarn, a 5mm (H-8) hook is a good starting point. The goal is to achieve a fabric that isn’t too loose; you don’t want stuffing peeking through. If your stitches are naturally quite loose, you might want to go down a hook size, perhaps to a 4.5mm (G-6). Conversely, if you tend to crochet tightly, you might use a 5.5mm (I-9) hook. It’s always a good idea to make a small test swatch with your chosen yarn and hook to check the tension.
Essential Stitch Techniques
The beauty of this pumpkin pattern lies in its simplicity. It primarily uses a few basic crochet stitches that are easy to learn and execute:
- Magic Ring (or Magic Circle): This is how you start the pumpkin, creating a tight, closed circle with no hole in the center. It’s a foundational technique for many amigurumi-style projects.
- Single Crochet (sc): This is the most fundamental crochet stitch. You’ll be working most of your stitches in this basic stitch, creating a dense fabric perfect for stuffing.
- Increase (inc): To make the pumpkin grow wider, you’ll work two single crochet stitches into the same stitch from the previous round. This is how you gradually build the shape.
- Decrease (dec): To close off the top of the pumpkin and prepare it for stuffing, you’ll work a decrease stitch. The pattern likely uses the invisible decrease, which is made by working a single crochet through the front loops only of two stitches, effectively decreasing your stitch count by one. This creates a neater finish than a standard decrease.
Understanding how to work in continuous rounds (spirals) is also key. This means you don’t join the end of a round with a slip stitch and then chain to start the next. Instead, you just keep crocheting around and around, often using a stitch marker to keep track of where each round begins.
Tips for Beginners
If you’re new to crochet, these pumpkins are an excellent project to build your confidence:
- Practice your stitches: Before starting the pumpkin, make a few swatches of single crochet, increases, and decreases. This helps you get a feel for the yarn and hook.
- Use a stitch marker: This is non-negotiable for working in the round. Place a marker in the first stitch of each round so you know exactly where to start and stop.
- Count your stitches: It’s easy to miss stitches or accidentally add them when you’re learning. Regularly count your stitches at the end of each round to ensure you have the correct number. This prevents wonky shapes.
- Don’t be afraid to frog (unravel): If you make a mistake, it’s okay to pull out your stitches and try again. That’s part of the learning process!
- Stuffing technique: When it comes to stuffing, start with small amounts. Gradually add more until the pumpkin is firm but not so overstuffed that it distorts the stitches. You want it to have a nice, plump shape.
Customizing Your Pumpkins
The beauty of crochet is how easily you can make a pattern your own:
Colors
While traditional pumpkins are orange, don’t limit yourself! Think about:
- Classic Autumn Colors: Various shades of orange, deep reds, warm yellows, and even browns.
- Whimsical Hues: Pastels for a softer look, or even jewel tones like emerald green or sapphire blue for a modern twist.
- Variegated Yarns: A self-striping yarn can create a beautiful, unique effect on each pumpkin.
- Stems: You can use brown, dark green, or even a contrasting color for the stem to make it pop.
Sizes
The size of your pumpkin is directly related to the yarn weight and hook size you use, and how many increases you make. To make a larger pumpkin, you would typically continue the increase rounds for a few more rounds before starting the decrease rounds. Conversely, to make a smaller pumpkin, you would stop increasing sooner. You can also experiment with different yarn weights – a chunkier yarn with a larger hook will yield a bigger pumpkin faster.
For the stem, you can also adjust its length and thickness by working more or fewer rounds in single crochet.
Care Instructions
These crocheted pumpkins are generally very durable. If they get a little dusty or need a refresh, you can:
- Spot Clean: Use a damp cloth with a mild soap to gently dab any spots.
- Hand Wash: For a more thorough clean, hand wash in cool water with a gentle detergent. Squeeze out excess water carefully – don’t wring.
- Dry Flat: Reshape the pumpkin and lay it flat on a towel to air dry. Avoid hanging it, as this can stretch the stitches out of shape.
- Machine Wash (with caution): Some acrylic yarns can be machine washed on a gentle cycle in cool water, placed inside a mesh laundry bag. Always check your yarn label for specific washing instructions. However, hand washing is generally safer to preserve the shape.
Project Ideas
These easy crochet pumpkins are incredibly versatile:
- Table Decor: Arrange them on a tray, scatter them on a runner, or place them individually as charming place settings.
- Wreath Embellishments: Attach them to a grapevine or foam wreath form for a handmade autumn wreath.
- Garlands: String several together with twine or ribbon to create a festive pumpkin garland.
- Bowl Fillers: Simply fill a decorative bowl with a collection of your crocheted pumpkins.
- Gift Toppers: Tie a small pumpkin onto a gift for a personal, crafty touch.
- Stuffed Toys: For larger versions, they can even serve as adorable, soft decorations for a child’s room.
This pattern from Maria’s Blue Crayon is a wonderful way to embrace the season and enjoy some satisfying crochet time.
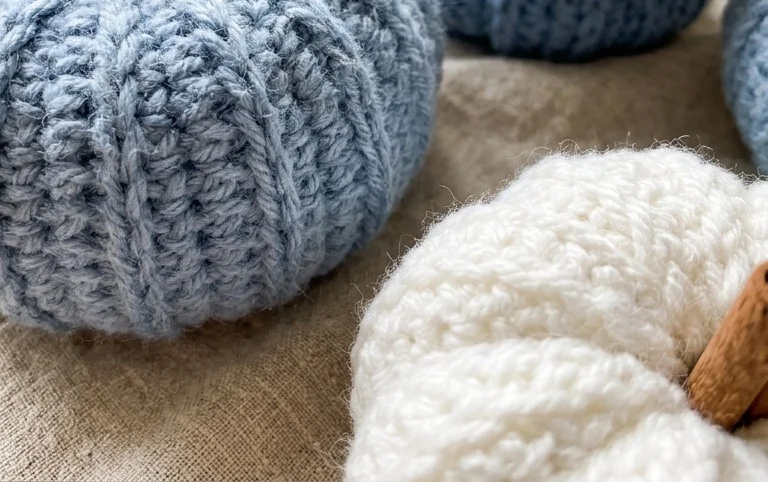
You’ve made your own little collection of crochet pumpkins! How satisfying is that? They add a wonderful handmade touch to your fall decorating. Feel free to experiment with different yarn colors – maybe try a speckled yarn for a unique look, or even a variegated yarn for a multi-colored effect. If you share your pumpkin patch on social media, be sure to tag Maria’s Blue Crayon so others can see your lovely work. Keep practicing those stitches, and don’t forget to check out more beginner-friendly patterns on the blog for your next cozy project.