This little amigurumi bat crochet pattern is just the sweetest thing, especially if you like a touch of spooky fun. Imagine a small, cuddly creature with floppy ears and tiny wings, perfect for perching on a shelf or tucking into a gift bag. It’s worked up in soft yarn, making it wonderfully squishy, which is always the best part of amigurumi, right? This project is a great starting point for anyone new to making stuffed toys. You’ll learn fundamental amigurumi techniques like working in continuous rounds, increasing, and decreasing, all explained clearly. Even if you’ve been crocheting for years, it’s a quick and satisfying make, perfect for getting into the Halloween spirit or just because you love cute, quirky makes. We’ll cover yarn choices that give it that classic bat look and the best hook size for tight, clean stitches so no stuffing peeks through. Get ready to create your own adorable, slightly gothic friend!
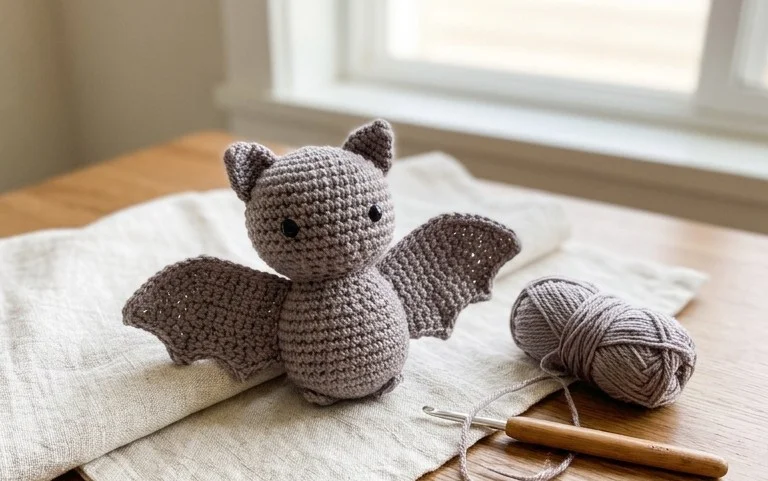
Amigurumi Bat Crochet Free Pattern: Your Spooky Best Friend
This amigurumi bat is a fantastic little project, perfect for Halloween or just adding a touch of gothic charm to your decor. It works up quickly and is wonderfully squishy, making it an ideal first amigurumi for beginners or a fun, fast make for experienced crocheters. The pattern is straightforward, focusing on basic amigurumi techniques that are easy to pick up.
Yarn and Hook Recommendations
For this bat, you’ll want a yarn that has a good stitch definition and a slight fluffiness to give it that characteristic bat-like texture. Worsted weight yarn is my go-to for amigurumi because it’s widely available and creates a nice size for the finished toy.
- Yarn Type: Acrylic yarn is an excellent choice for amigurumi. It’s durable, washable, and comes in a vast array of colors. Cotton or a cotton blend can also work, but they might be a little stiffer. For a softer feel, consider a plush yarn, though that will require adjusting your hook size and stitch count as it’s much bulkier.
- Yarn Weight: Worsted weight (category 4) is ideal.
- Colors: Black is the obvious choice for a bat, but don’t be afraid to experiment! Deep purples, dark grays, or even a spooky orange would be fun. For the eyes, you can use black embroidery floss or small safety eyes.
- Hook Size: Typically, you’ll use a hook one size smaller than what the yarn label recommends for amigurumi. This creates tighter stitches, preventing stuffing from showing through. For worsted weight yarn, a 3.0mm to 3.5mm crochet hook is usually perfect. Check your gauge by crocheting a small swatch to ensure your stitches are firm.
Stitch Techniques You’ll Use
This pattern relies on a few fundamental crochet stitches that are the building blocks of most amigurumi.
- Magic Ring (or Magic Circle): This creates a tight, adjustable starting point for your rounds, ensuring there are no gaps at the top of your bat’s head or body. It’s a little tricky at first, but once you get the hang of it, you’ll use it for all your amigurumi projects.
- Single Crochet (sc): This is the workhorse of amigurumi. It creates a dense fabric that holds stuffing well.
- Increase (inc): This involves crocheting two single crochets into the same stitch. You’ll use this to make your pieces wider.
- Decrease (dec): This is crocheting two stitches together as one. For amigurumi, the invisible decrease is best. To do this, you insert your hook into the front loop of the first stitch, then the front loop of the second stitch, yarn over, and pull through both loops. Then, yarn over and pull through the remaining two loops on your hook. This method creates a much neater, less noticeable decrease than simply crocheting two stitches together.
- Slip Stitch (sl st): Used to join rounds or finish off your work.
- Chain (ch): Used for starting rows or creating decorative elements.
Tips for Beginners
Don’t let the small stitches and tight turns intimidate you! This bat is a great learning project.
- Stitch Marker: Always use a stitch marker to mark the beginning of each round. Amigurumi is worked in continuous rounds, and it’s very easy to lose your place without one.
- Tension: Try to maintain consistent tension. This means your stitches should be neither too tight (making it hard to work into) nor too loose (allowing stuffing to peek through). Practice a few rows of single crochet to get a feel for it.
- Stuffing: Stuff as you go, but don’t overstuff. It’s better to stuff in smaller increments, working the stuffing into any gaps, rather than waiting until the very end. Use polyester fiberfill for toys. Stuff firmly but gently; you don’t want it to bulge or distort the shape. A chopstick or the blunt end of a crochet hook is helpful for pushing stuffing into smaller areas.
- Counting: Count your stitches at the end of each round. This is the most important habit for amigurumi. If you’ve made a mistake, it’s much easier to frog (undo) a few stitches than an entire piece.
- Sewing: When sewing pieces together, use a yarn needle and the same yarn you used to crochet the pieces. Leave a long tail when you finish off a piece (e.g., the wings or ears) so you have enough length to sew it securely to the body.
Customizing Your Bat
Once you’ve mastered the basic pattern, there are tons of ways to make your bat your own.
Colors
- Stripes: Alternate colors every few rounds for a striped effect on the body.
- Contrast Wings: Make the wings a different color than the body. A classic black body with purple or red wings can look very striking.
- Accents: Use a contrasting color for the ears or the belly of the bat.
Sizes
- Smaller Bat: Use a finer weight yarn (like sport weight or DK) and a smaller hook (e.g., 2.0mm or 2.5mm). The finished bat will be smaller.
- Larger Bat: Use a bulkier yarn (like bulky or super bulky) and a larger hook (e.g., 5.0mm or 6.0mm). This will result in a much larger, cuddlier bat. Be aware that you might need to adjust stitch counts slightly for larger sizes to maintain pleasing proportions.
Caring for Your Finished Bat
Amigurumi toys are generally quite durable, but a little care will help them last.
- Washing: For acrylic yarn, a gentle machine wash on a cool or warm cycle is usually fine. Place the bat inside a mesh laundry bag to protect it from snagging.
- Drying: It’s best to air dry your amigurumi. Lay it flat on a clean towel, reshaping it gently as needed. Avoid putting it in the dryer, as the heat can damage the stuffing and yarn.
- Spot Cleaning: For small marks, you can often spot clean with a damp cloth and a little mild soap.
Project Ideas
Beyond a simple desk buddy or toy, your amigurumi bat can be part of many creative projects.
- Halloween Decorations: String several bats together to create a garland. Attach them to branches for a spooky centerpiece.
- Keychains: Add a keychain ring to the top of the bat for a fun accessory.
- Gift Embellishments: Sew a small bat onto the front of a handmade card or gift bag.
- Amigurumi Family: Make a whole brood of bats in different sizes and colors for a fun display.
- Amigurumi Friends: Pair your bat with other Halloween amigurumi patterns like ghosts, pumpkins, or spiders.
This little bat is more than just a crochet project; it’s a companion waiting to be made. Happy crocheting!
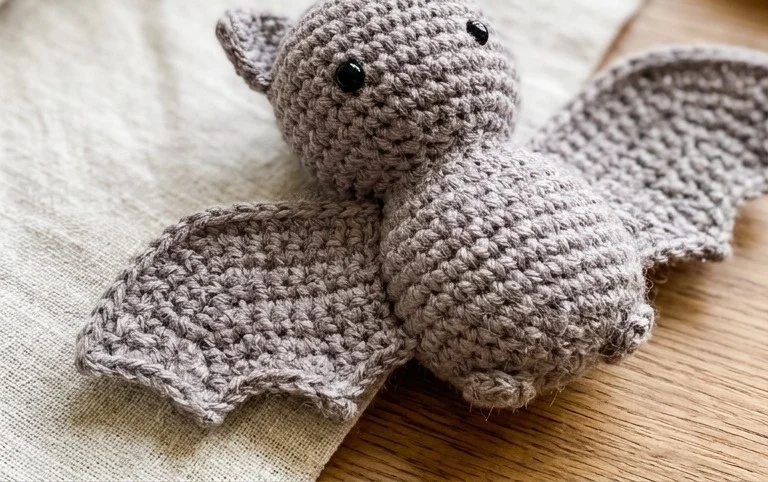
So there you have it – your very own amigurumi bat! I hope you’ve enjoyed making this spooky little friend. Don’t forget to share your finished bat on social media using the pattern tag; I’d love to see what colors you chose! Maybe you’ll try a different color for a unique look, or perhaps add a little bow. If you liked this pattern, there are more free amigurumi patterns waiting for you right here. Keep those hooks busy and happy crocheting!